
An Advent calendar should give you a clear next step each morning—not twenty-four new things to buy. A row of envelopes, a stack of books you already own, or a little box refilled each evening can make the countdown feel special without filling the house with trinkets.
These ten Christmas Advent calendar ideas pair real makers’ photographs with practical ways to count from December 1 through 24. Some original projects use a different number of containers; the adaptations below explain exactly how to make them work for twenty-four days. There is also a ready-to-use activity plan at the end.
Choose the countdown before the containers
The dates: For this December 1–24 countdown, number twenty-four cards or spaces before decorating. Put busy-day activities on dates that suit your household. If you want a Christmas Day extra, label it separately rather than accidentally leaving the calendar one day short.
Let the contents set the size
The materials: Start with paper prompts, photos, or books you already have. Make one sample container and check that a folded note fits before making twenty-three more. The dimensions mentioned below are the original makers’ examples, not universal sizing rules. Borrow a frame or reuse clean packaging before buying matching supplies.
Make it an adult-managed display
The boundaries: Adults should handle craft knives, hot glue, mounting, and daily removal of clips or ties. Secure frames and branches against tipping, and keep hanging cords away from cribs, beds, and play areas. These are decorative projects, not instructions for a tested children’s toy. CPSC guidance warns about small parts for children under three and hazardous magnets, button and coin batteries, and long strings around infants. Leave loose batteries, magnets, tiny toys, and real candles out of the fillers; an adult can read a paper activity instead. If you choose edible treats, keep their original ingredient labels and storage instructions, and check the full label for allergens each time. A missing “may contain” warning is not a guarantee against cross-contact.
1. Numbered Muslin Bags + an Upcycled Frame
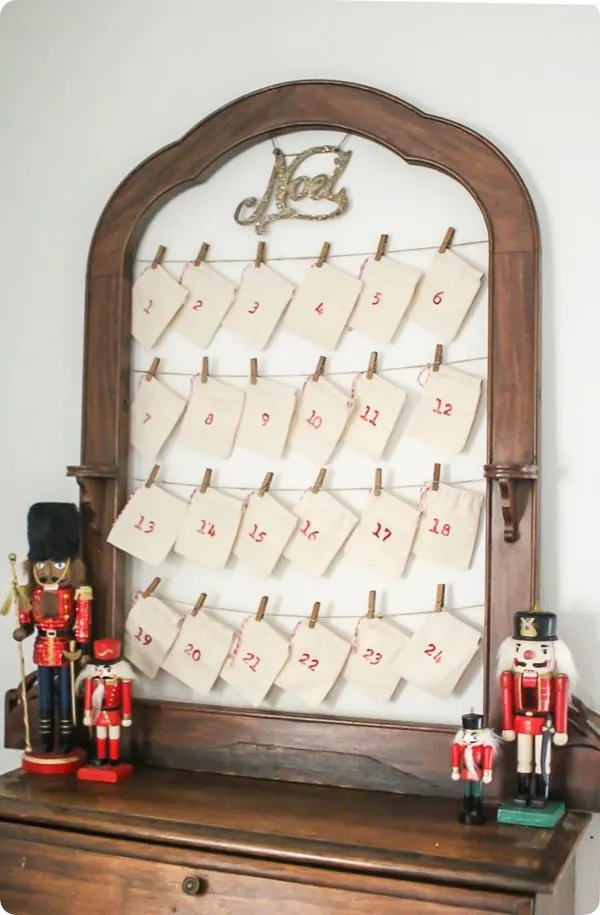
Carrie’s arched wooden frame holds four rows of cream bags, with red numbers making the order easy to follow. The fabric and small clips give this reusable Advent calendar a softer look than a wall of bright packaging.
Make it work for 24 days: Prepare twenty-four bags, number them 1–24, and put one folded activity card in each. Carrie used 3-by-4-inch muslin bags in a roughly 2-by-3-foot frame, with strings six inches apart. Those are her project dimensions; lay out your own bags on paper to check the fit before attaching anything.
Display tip: Secure the frame with hardware appropriate for its finished load rather than relying on a loose lean against the wall. An adult should retrieve the daily card. Empty the bags afterward and store them dry with their numbers intact for next December.
2. Flip-Over Photo Cards + a Hanging Gallery
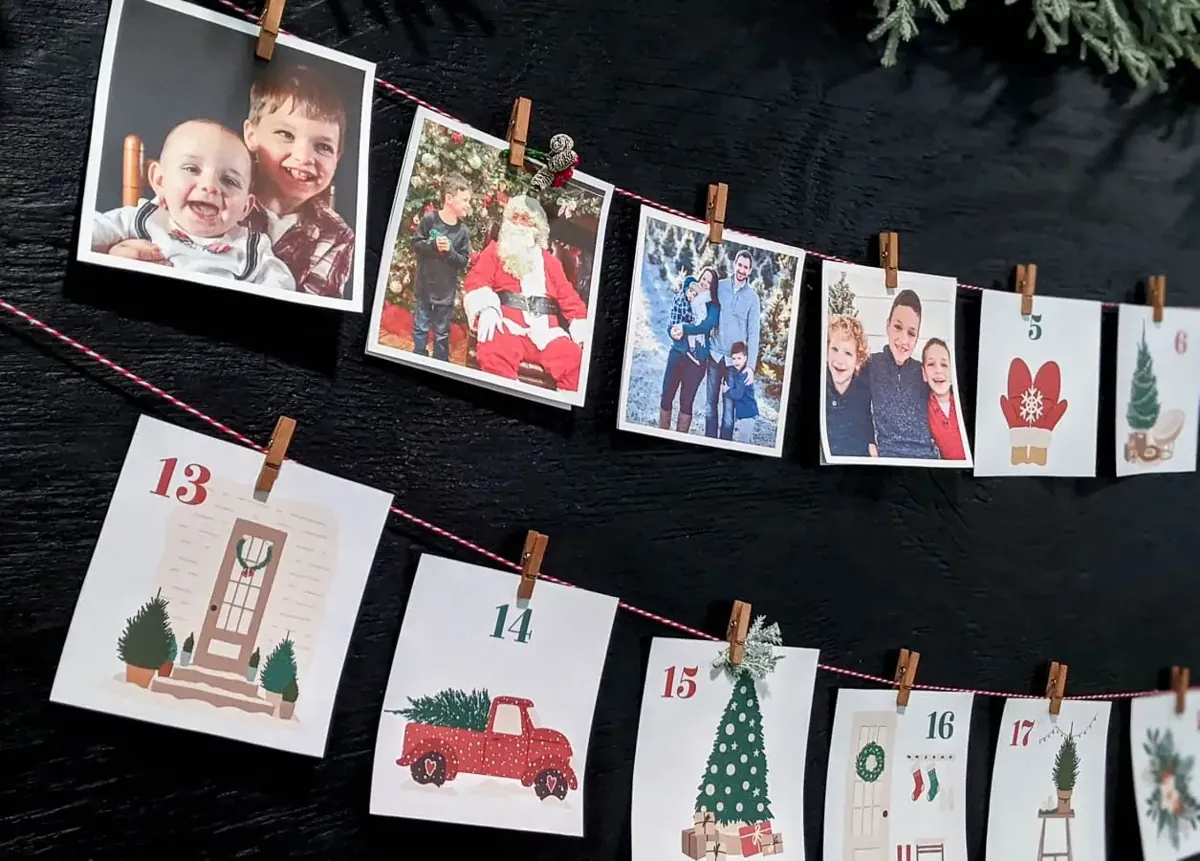
The upper cards in Carrie’s display have already been turned to reveal family photographs, while illustrated date cards remain below. Each new picture changes the display, so the countdown itself becomes the decoration rather than hiding another object inside a pocket.
What you need: Choose twenty-four of your own photos, print them, and pair each with an equally sized card numbered 1–24. Clip the date facing out and the photo behind it, then reverse one pair each day. Test one pair first so the backs align neatly. Secure the hanging lines where they cannot be pulled down.
Budget note: Handwritten numbers work without buying a template. The creator’s illustrated printable is offered through her newsletter signup; it is optional, not necessary to make the photo calendar. For a smaller wall, hang fewer cards at once and keep the remaining dated pairs in order.
3. Paper-Tube Parcels + a Branch Tree
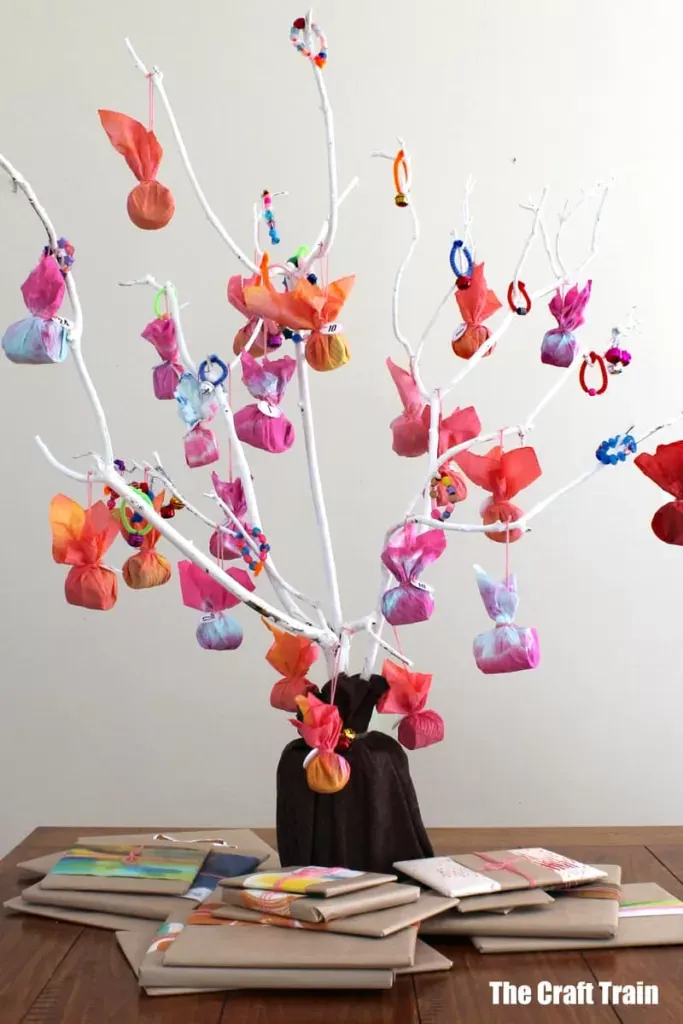
Kate’s branch tree holds little wrapped parcels at different heights, with numbered tags making a simple bare branch into a real countdown. The books below are not needed to make the hanging calendar function.
The 24-day setup: The original tutorial cuts twelve cardboard tubes in half for twenty-four parcels. Use clean, dry craft tubes, fit a folded paper prompt inside each half, then wrap and label them 1–24. Follow the linked maker’s folding and wrapping instructions rather than assuming every tube size holds the same contents.
Small-space tip: Keep the parcels light and use a stable, secured branch display beyond young children’s reach. Skip the bead and bell ornaments for a household with young children. An adult removes the parcel and its ties before sharing the message. If you do not have a suitably stable stand, choose the envelope or single-box option instead of improvising a top-heavy branch in a narrow vase.
4. Santa Favor Boxes + a Tabletop Countdown
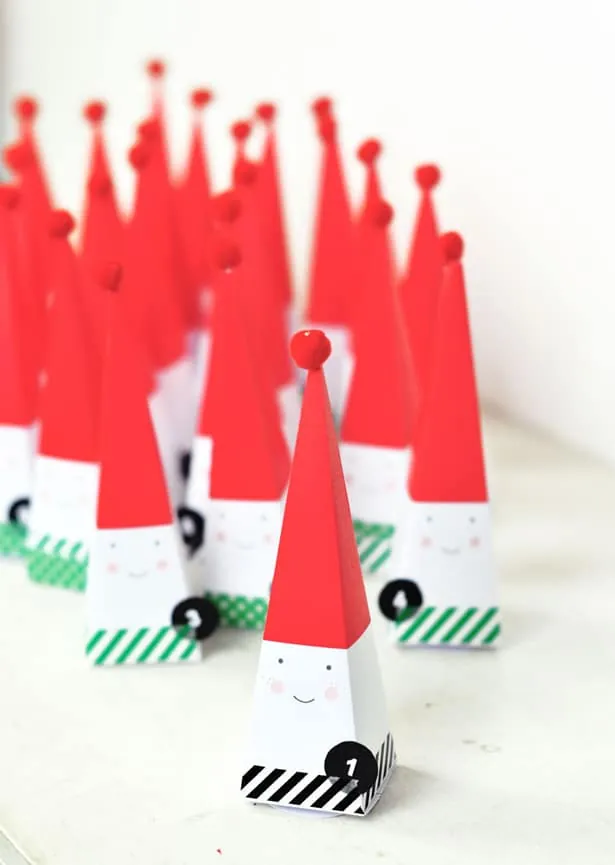
Ana Carriço’s little red Santa boxes make the containers themselves the Christmas scene. Their printed faces and white beards give each box character, so they do not need extra beads, bells, or miniature accessories to look finished.
Make it yours: Use the creator’s linked printable and assembly instructions for the shaped boxes, following her download terms. Make twenty-four and add clear 1–24 labels to the fronts or bases; the photograph is a sample group, not evidence of a complete numbered set. Test one folded box with your planned paper card before printing the full batch.
Difficulty: This involves repeated cutting, folding, and joining rather than one quick fold. Adults can handle cutting and supervise any child participation. Arrange the boxes on a shallow tray in date order, moving the opened ones aside so tomorrow’s Santa is easy to find.
5. Punch-Out Paper Cups + a Christmas Tree Board
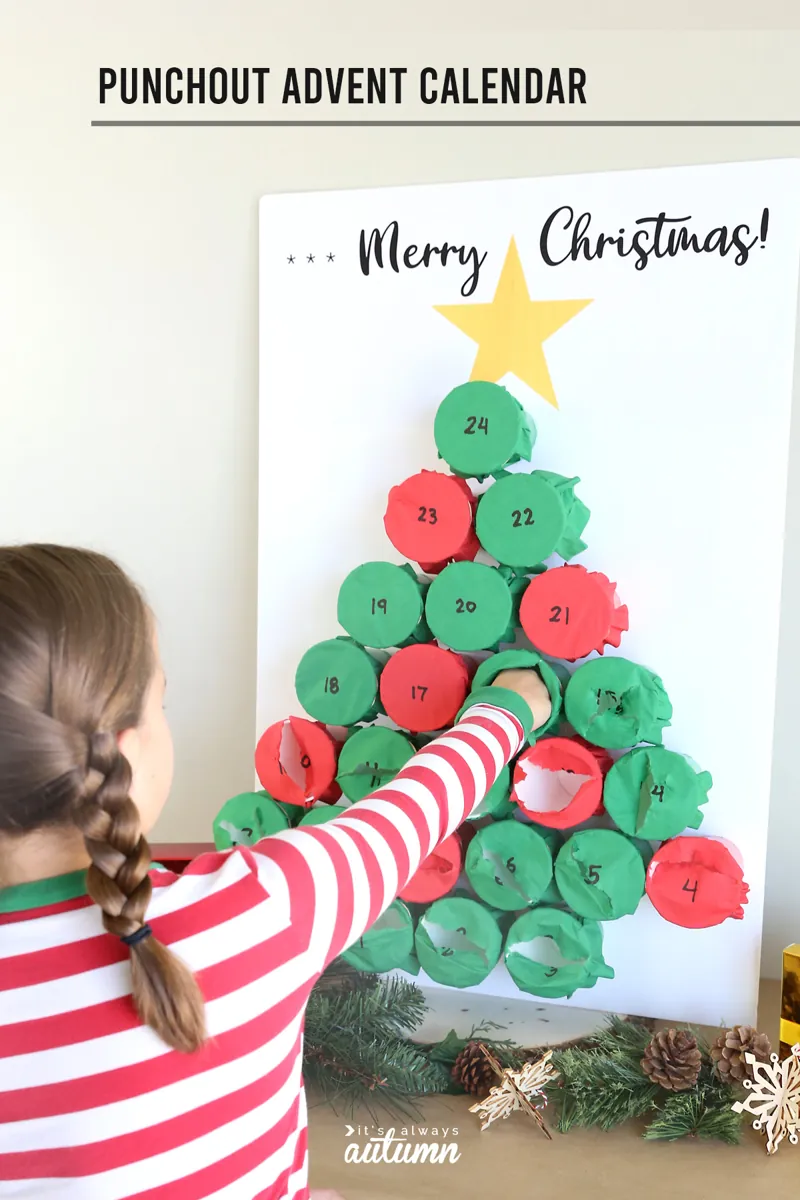
Autumn’s red and green cups form a tree, with numbered tissue covers marking the daily openings. The photograph shows the calendar partly opened: that is the point of this version, as the tree gradually records the days already enjoyed.
What you need: Her original uses twenty-four small paper cups on a 20-by-30-inch foam-core board. Dry-fit the arrangement before gluing, label the covers 1–24, and put a folded activity slip in each cup. Read the original assembly instructions for the cover attachment and tree layout; an adult should do the hot-gluing.
Display tip: Keep the contents light—the creator specifically warns that heavy fillers can make the board tip forward. Secure or support it for the forward pressure of opening a cup, and have an adult steady it; do not rely on an unsecured board leaning against a wall. Clear torn tissue and any loose cover fasteners after each opening.
6. Present-Decorated Envelopes + a Wall Countdown
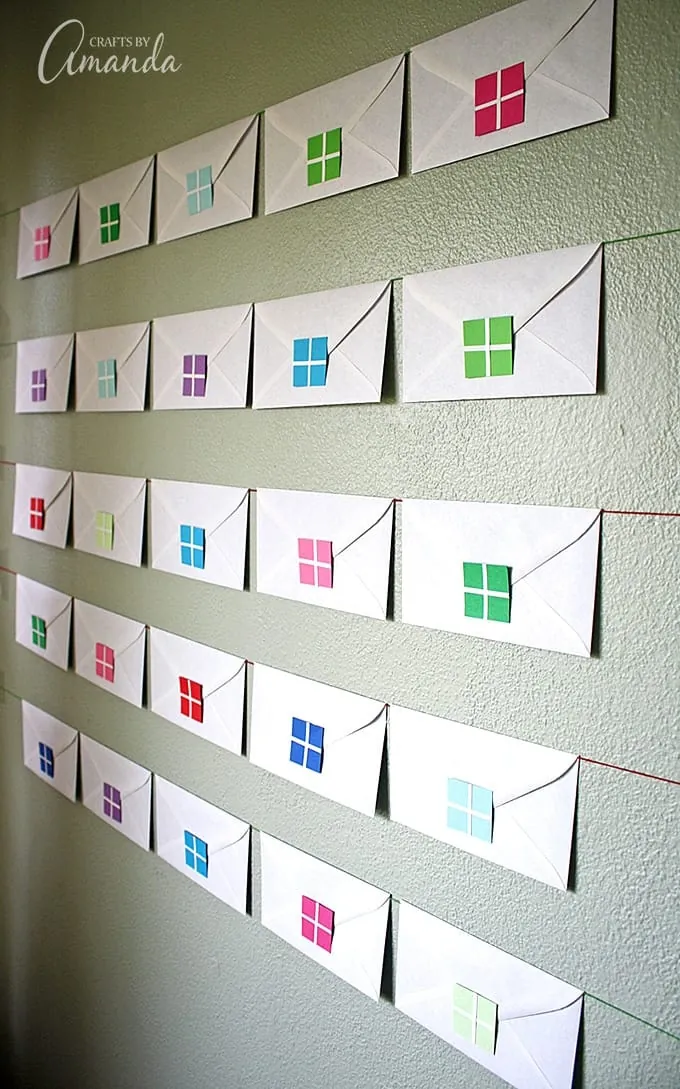
Amanda’s white envelopes are decorated with little paper presents and arranged in tidy rows. The broad, flat format suits activity notes and drawings better than bulky toys, and the repeated white shapes keep a colorful countdown from looking cluttered.
The date adjustment: The original tutorial uses twenty-five letter-size envelopes. For December 1–24, use twenty-four and clearly number their fronts 1–24; the source photograph emphasizes the present decorations rather than prominent date labels. You can keep a twenty-fifth envelope as a separately labeled Christmas Day message if you want one.
Renter-friendly alternative: If you cannot use suitable wall fixings, stand the numbered envelopes upright in a reused box and move each opened one to the back. Do not assume adhesive products are removable on every paint finish. Fill the envelopes with the activity plan below, a drawing, or a short note.
7. Twelve Jars + Two Clearly Labeled Rounds
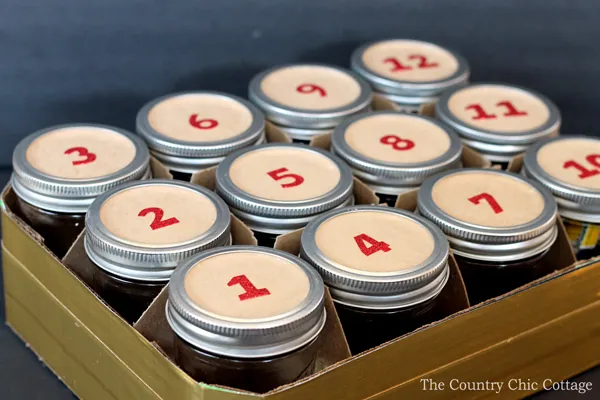
Angie Holden’s original has twelve small glass jars, numbered 1–12, nestled in a gold-covered case. It is a twelve-container calendar—not a twenty-four-jar display. Reusing the same set for a second round gives it a full December countdown without doubling the glassware.
Our 24-day adaptation: Use the original labels for December 1–12, then have an adult replace them with prepared labels 13–24 and refill the jars on the evening of December 12. Keep the second set of paper prompts in a separate envelope until then. A note beside the tray can explain the two rounds from the start.
Material note: Glass and removable lids make this an adult-handled display, not something for a small child to open alone. Keep it on a stable surface away from an edge. For a child-centered version, substitute suitable nonbreakable containers and use large paper notes rather than loose small parts.
8. Wrapped Books + a Read-Together Stack
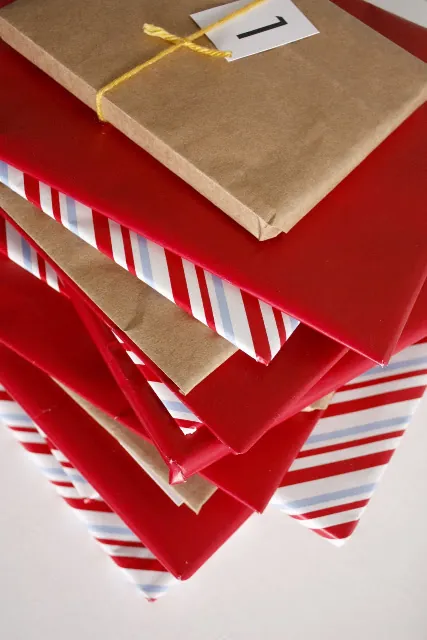
Delia’s stacked books use a mix of kraft, red, and striped papers, making familiar stories feel like little gifts. The photograph shows a wrapped stack rather than every book spread out; the visible day-one tag shows where the date labels belong.
Set up the sequence: Choose twenty-four books you already own or can borrow for the required period, wrap them, and number them 1–24. Read that day’s book together and return it to the shelf. They do not all have to be Christmas titles, and a favorite reread is better than buying a book just to reach the number.
Budget alternative: With a smaller collection, wrap only the books you have and use the remaining dated cards for rereading a chosen story. Call this a twenty-four-day reading plan, not twenty-four different books. Keep stacks low and stable, away from heaters and walkways; save usable paper for next year.
9. A Paper Tree + Twenty-Four Changeable Stars
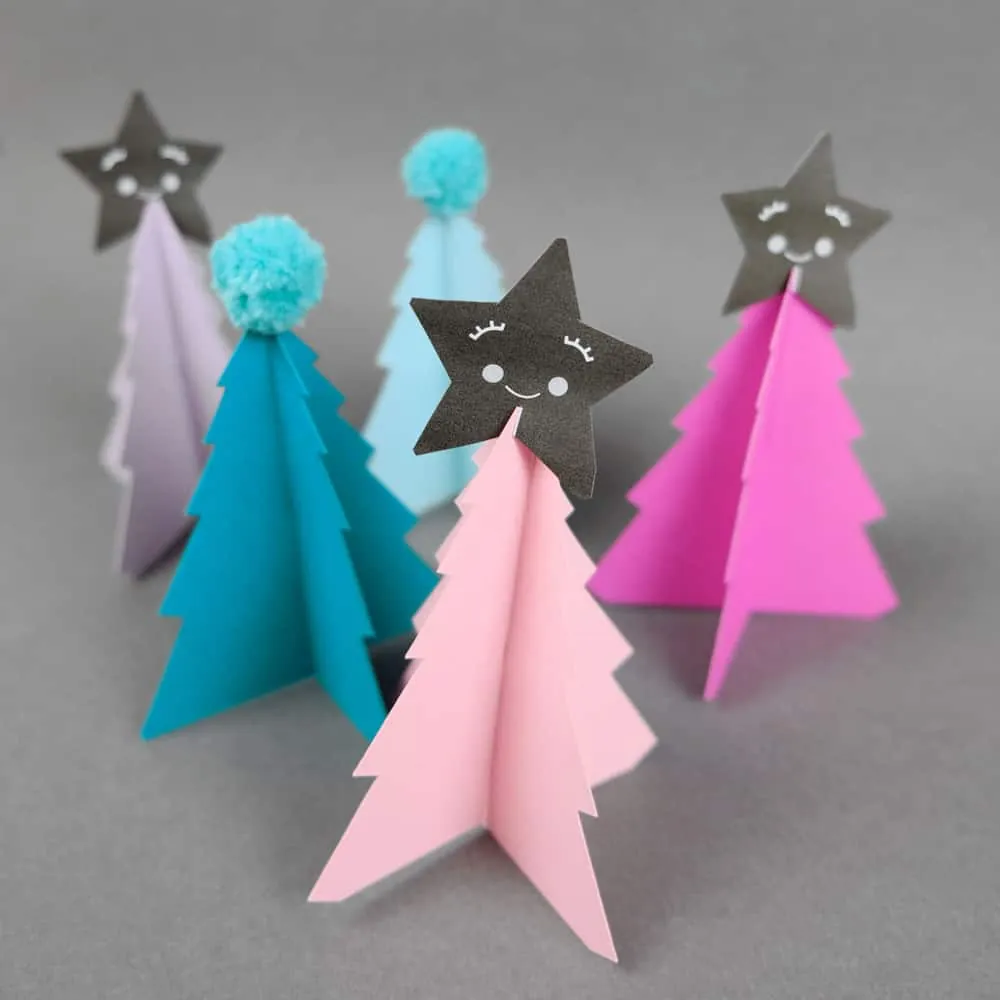
Ana’s colorful paper trees have a sculptural, three-dimensional shape, with smiling black stars and pom poms adding the finishing details. This photograph shows decorative sample trees, not a numbered twenty-four-day calendar. Her tutorial also describes countdown stars; add date markers to turn the trees into a daily display, rather than treating them as gift boxes.
Our small-space adaptation: Make one tree using the linked template, then prepare twenty-four paper stars numbered 1–24. Store them in order in an envelope and replace the displayed star each morning. Pair each date with one activity from the table below; keep those prompts in the same envelope. There is no need to fit twenty-four trees on a windowsill.
Make it simpler: Skip detachable pom poms and use drawn decoration instead. Adults should handle cutting and the daily star change for young children. Save the spare stars in a flat folder so the next date does not disappear among the rest of the craft supplies.
10. One Refilled Gold Box + a Dated Card Stack

Delia’s gold box tied with a red ribbon is a different approach: the same container returns each morning with a new message. It suits a small home or a household that would rather have one daily ritual than twenty-four parcels on display.
Give it a real 24-day structure: Our adaptation pairs the daily-refilled box with twenty-four cards labeled December 1–24. Prepare them in advance, keep the unopened stack elsewhere, and put the next day’s card in the box each evening. Move each finished card into a “done” envelope so you can see the countdown progressing. The photograph shows the reusable box, not a prefilled twenty-four-compartment calendar.
Budget note: Reuse a clean gift box; gold paint and ribbon are optional. Put in a paper activity instead of a purchased surprise. An adult can remove decorative ribbon before handing over the card. Keeping the plan on paper also lets you swap a busy day’s activity without reopening twenty-four containers.
A Ready-to-Use December 1–24 Activity Plan
Write one prompt on each dated card, or copy the whole plan and cut it into slips. These are suggestions, not a tested schedule or a shopping list: swap dates to suit your household, choose age-appropriate activities, and have an adult help with cutting, calls, and warm drinks. The “card” column works in every calendar above, including the two-round jars and single refilled box.
| Date | Card prompt |
|---|---|
| December 1 | Choose a favorite holiday song to play together. |
| December 2 | Read a story you already own. |
| December 3 | Draw a card for someone you care about. |
| December 4 | Tell each other one thing you are grateful for. |
| December 5 | Play an age-appropriate game you already have. |
| December 6 | Look for Christmas lights from your window. |
| December 7 | Have an adult help you call a relative or friend. |
| December 8 | Decorate a paper snowflake an adult has cut out. |
| December 9 | Sing a song together, with or without music. |
| December 10 | Choose an outgrown book to offer for donation. |
| December 11 | Draw a winter scene using supplies on hand. |
| December 12 | Have an indoor picnic with your usual meal. |
| December 13 | Leave a kind paper message for someone at home. |
| December 14 | Reread a favorite picture-book page together. |
| December 15 | Design a paper ornament with crayons. |
| December 16 | Dance together for the length of one song. |
| December 17 | Sort leftover craft paper for another project. |
| December 18 | Choose one small, age-appropriate way to help at home. |
| December 19 | Make a paper bookmark for your next story. |
| December 20 | Find three winter colors around the house. |
| December 21 | Enjoy a family-suitable warm drink prepared by an adult. |
| December 22 | Wrap a book you already own for tomorrow. |
| December 23 | Unwrap yesterday’s book and read it together. |
| December 24 | Share your favorite memory from this month. |
Choose the container system you can keep up with, then let a familiar story or a simple shared activity be enough.